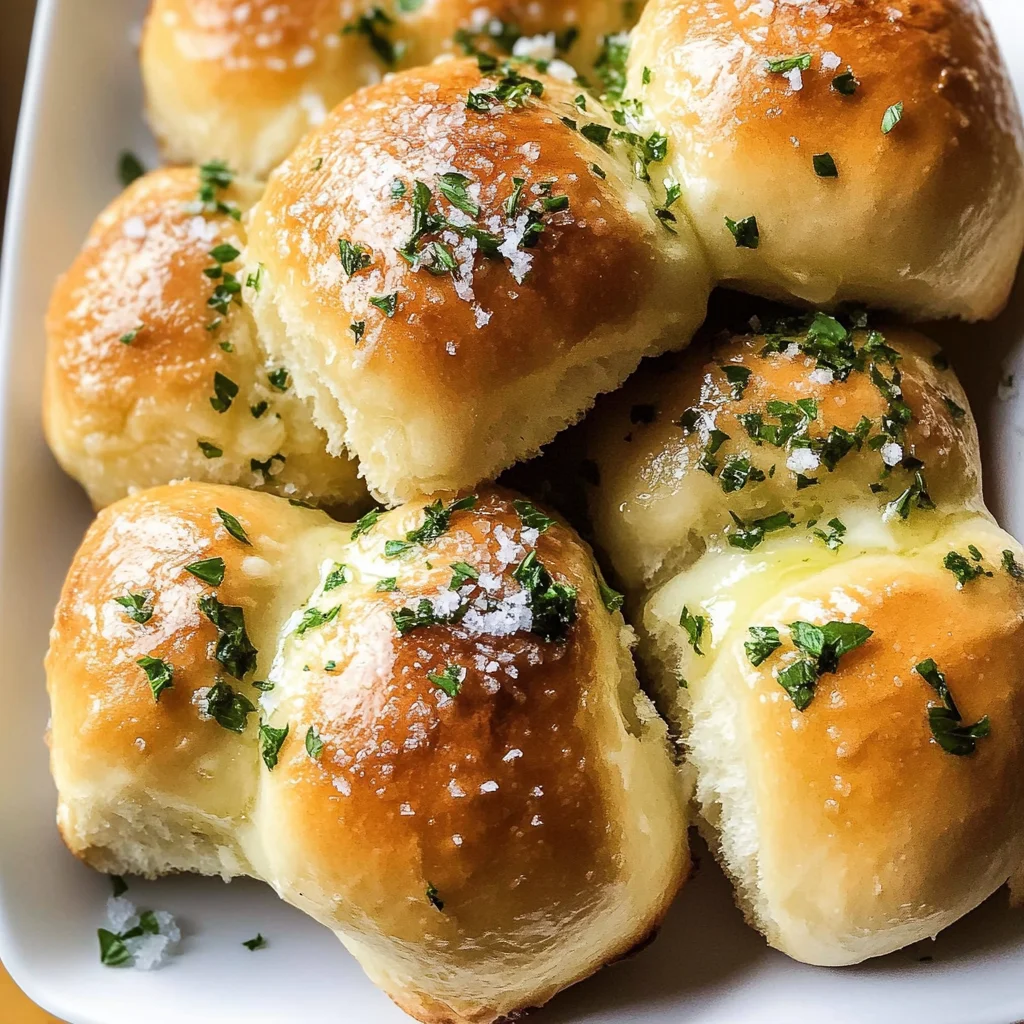
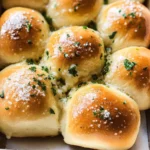
Garlic Bread Rolls
If you’re looking for a delightful twist on traditional dinner rolls, these Garlic Bread Rolls are sure to steal the show! Soft, fluffy, and bursting with garlicky goodness, they make the perfect addition to any meal. Whether it’s a busy weeknight or a family gathering, these rolls are an easy way to elevate your dining experience. Trust me, once you try them, you’ll want to make them time and again!
The magic of these Garlic Bread Rolls lies not only in their flavor but also in how simple they are to prepare. You can whip them up as a comforting side dish or even enjoy them on their own. Let’s dive into why this recipe will become a favorite in your home!
Why You’ll Love This Recipe
- Easy Preparation: With straightforward steps, this recipe is perfect for both seasoned bakers and beginners alike.
- Family-Friendly Appeal: Everyone loves warm, buttery rolls! These Garlic Bread Rolls are sure to please even the pickiest eaters.
- Make-Ahead Convenience: You can prep the dough ahead of time and bake them fresh when you’re ready—ideal for gatherings!
- Deliciously Flavorful: The combination of fresh garlic and herb butter creates an irresistible aroma that fills your kitchen.
- Versatile Side Dish: Pair them with soups, salads, or pasta—these rolls complement almost any meal beautifully.
Ingredients You’ll Need
Let’s talk about the ingredients! This recipe uses simple, wholesome items that you probably already have in your pantry. Each ingredient plays a role in creating those soft and flavorful Garlic Bread Rolls we all love.
For the Dough:
- 4 1/2 tablespoons unsalted butter
- 2 tablespoons minced garlic
- 3 1/2 cups + 1 tablespoon all-purpose flour (See notes below for measuring)
- 3 tablespoons chopped fresh parsley
- 1 tablespoon granulated sugar
- 2 1/4 teaspoons instant yeast
- 1 teaspoon fine sea salt
- 1 cup whole or 2% milk (warmed to 110°F)
- 1 large egg (room temperature)
For the Topping:
- 1 beaten egg (for brushing the tops)
- 2 tablespoons unsalted butter
- 1 tablespoon minced garlic
- 1 tablespoon chopped fresh parsley
- Flaky sea salt (for finishing)
Variations
One of the best things about these Garlic Bread Rolls is how flexible they can be! Feel free to customize them based on your taste preferences or what’s available in your kitchen.
- Add Cheese: Sprinkle some shredded mozzarella or parmesan inside the dough before shaping for an extra cheesy surprise!
- Herb Infusion: Mix in different fresh herbs like rosemary or thyme for a unique flavor twist.
- Spicy Kick: Add a pinch of red pepper flakes to the garlic butter for those who love a little heat.
- Whole Wheat Option: Substitute half of the all-purpose flour with whole wheat flour for a healthier version while still keeping them fluffy.
How to Make Garlic Bread Rolls
Step 1: Prepare Your Pan
Start by lightly buttering the bottom and sides of a 9×13 pan. This step ensures that your rolls won’t stick when it’s time to serve. Plus, it adds extra flavor!
Step 2: Make Garlic Butter
In a small pot, melt the unsalted butter over low heat and add the minced garlic. Cook it for just 1-2 minutes until fragrant—this will infuse your dough with delicious garlic flavor. Set it aside to cool while you gather other ingredients.
Step 3: Combine Dry Ingredients
In a stand mixing bowl, combine all-purpose flour, chopped parsley, sugar, yeast, and salt. Mixing these dry ingredients first helps distribute everything evenly before adding wet ingredients.
Step 4: Knead the Dough
Add warmed milk, room temperature egg, and cooled garlic butter into the dry mixture. Knead on low speed with a dough hook until smooth and tacky—this usually takes about 10-12 minutes. If it feels too sticky, don’t worry! Just add flour one tablespoon at a time until it’s workable.
Step 5: Shape the Rolls
Cut your kneaded dough into 12 equal portions (around 67 grams each). Shape each piece into a smooth ball by pinching the seam underneath—this keeps them nice and tight. Place them into your prepared baking pan and cover with plastic wrap or a clean kitchen towel.
Step 6: Let Them Rise
Find a warm spot for your rolls to rise until they double in size—this usually takes about 1-2 hours. Watching them puff up is part of the fun!
Step 7: Bake Those Rolls!
Preheat your oven to 350°F (180°C). Once risen, brush the tops with beaten egg wash before baking for about 20-30 minutes until they’re golden brown on top.
Step 8: Brush with Garlic Butter
While they’re baking, prepare more garlic herb butter by melting additional butter with minced garlic again. As soon as those delicious rolls come out of the oven, brush them generously with this mixture and sprinkle flaky sea salt on top if desired.
And there you have it! Warm and flavorful Garlic Bread Rolls that will make every meal feel special. Enjoy sharing them with family and friends—the joy is in every bite!
Pro Tips for Making Garlic Bread Rolls
Making garlic bread rolls can be a delightful experience, and with a few handy tips, you can elevate your baking game!
-
Use fresh garlic: Fresh minced garlic provides a more robust flavor than pre-packaged alternatives. The aroma and taste of fresh garlic truly enhance the overall experience of these rolls.
-
Knead until smooth: Ensure that you knead the dough until it’s smooth and elastic. This helps develop the gluten structure, giving your rolls that perfect soft texture when baked.
-
Let them rise properly: Don’t rush the rising process! Allowing the dough to double in size ensures light and fluffy rolls. A warm, draft-free area is ideal for this step.
-
Brush with garlic butter while hot: Immediately brushing the rolls with garlic butter as soon as they come out of the oven allows the flavor to seep into every bite. This creates that deliciously garlicky crust everyone loves.
-
Experiment with herbs: Feel free to mix in different fresh herbs like rosemary or thyme into the dough or butter. This adds a unique twist to your classic garlic bread roll.
How to Serve Garlic Bread Rolls
These garlic bread rolls are not only delicious on their own but also make a fantastic addition to any meal. Here are some fun ideas for serving them up!
Garnishes
- Chopped Fresh Herbs: A sprinkle of chopped parsley or chives on top adds a pop of color and freshness.
- Grated Parmesan Cheese: For those who enjoy a cheesy touch, sprinkle some grated cheese on top before baking for an extra savory layer.
Side Dishes
- Mixed Green Salad: A light salad with a tangy vinaigrette complements the richness of the rolls beautifully, balancing out flavors.
- Creamy Tomato Soup: Serve your garlic bread rolls alongside a warm bowl of creamy tomato soup for a comforting combination that’s perfect for cozy evenings.
- Roasted Vegetables: Seasoned roasted veggies bring vibrant colors and healthiness to your meal, making it both tasty and nutritious.
- Pasta Primavera: Pairing these rolls with pasta dishes loaded with fresh vegetables is a great way to create a satisfying meal full of textures and flavors.
With these tips and serving suggestions, your garlic bread rolls will not only taste amazing but will also impress anyone who gets to enjoy them! Happy baking!

Make Ahead and Storage
Garlic bread rolls are perfect for meal prep, allowing you to enjoy homemade goodness any day of the week. These rolls can be made in advance, stored, or even frozen, making them a convenient option for busy schedules.
Storing Leftovers
- Store any leftover rolls in an airtight container at room temperature for up to 2 days.
- If you prefer them warm, place them in a microwave-safe container and cover to retain moisture.
Freezing
- Allow the cooled rolls to cool completely before freezing.
- Wrap each roll tightly in plastic wrap and then place them in a freezer-safe bag.
- They can be frozen for up to 3 months.
Reheating
- To reheat from frozen, preheat your oven to 350°F (180°C).
- Unwrap the rolls and place them on a baking sheet; bake for about 10–15 minutes until warmed through.
- For quicker reheating, microwave individual rolls for about 15-20 seconds.
FAQs
Here are some common questions about garlic bread rolls that might help clarify your baking journey!
Can I make garlic bread rolls without using eggs?
Absolutely! You can replace the egg with a flaxseed egg (1 tablespoon ground flaxseed mixed with 2.5 tablespoons water) or simply omit it. The texture will be slightly different but still delicious!
How can I ensure my garlic bread rolls are fluffy?
For fluffy garlic bread rolls, make sure your yeast is fresh and active. Knead the dough until it’s smooth and tacky but not overly sticky. Give it enough time to rise in a warm environment so that it doubles in size.
What makes these garlic bread rolls special?
These garlic bread rolls stand out because they incorporate fresh garlic directly into the dough and are brushed with aromatic garlic herb butter after baking, creating a flavor-packed treat that’s soft and fluffy.
How can I store leftover garlic bread rolls?
Store leftover garlic bread rolls in an airtight container at room temperature for up to two days or freeze them for longer storage. They reheat beautifully!
Final Thoughts
I hope you find joy in making these delightful garlic bread rolls! Their soft texture combined with rich garlic flavor makes them an irresistible addition to any meal. Whether enjoyed fresh out of the oven or reheated later, they promise comfort and satisfaction. Happy baking, and don’t forget to share your creations with friends and family!
Garlic Bread Rolls
Garlic Bread Rolls are the perfect blend of soft, fluffy texture and rich, garlicky flavor that can elevate any meal. These delightful rolls are incredibly easy to make, making them an ideal choice for busy weeknights or family gatherings. With just a few basic ingredients and simple steps, you can create warm, buttery rolls that will have everyone coming back for seconds. The addition of fresh garlic and herb-infused butter not only enhances the taste but also fills your kitchen with an irresistible aroma. Whether served alongside soups, salads, or pasta dishes, these Garlic Bread Rolls are a comforting and versatile side that everyone will love.
- Prep Time: 15 minutes
- Cook Time: 30 minutes
- Total Time: 45 minutes
- Yield: Serves 12 rolls 1x
- Category: Side Dish
- Method: Baking
- Cuisine: American
Ingredients
- 4 1/2 tablespoons unsalted butter
- 2 tablespoons minced garlic
- 3 1/2 cups + 1 tablespoon all-purpose flour
- 3 tablespoons chopped fresh parsley
- 1 tablespoon granulated sugar
- 2 1/4 teaspoons instant yeast
- 1 teaspoon fine sea salt
- 1 cup whole or 2% milk (warmed to 110°F)
- 1 large egg (room temperature)
- 1 beaten egg (for brushing the tops)
- 2 tablespoons unsalted butter (for topping)
- 1 tablespoon minced garlic (for topping)
- 1 tablespoon chopped fresh parsley (for topping)
- Flaky sea salt (for finishing)
Instructions
- Preheat your oven to 350°F (180°C) and grease a 9×13 baking pan.
- Melt unsalted butter in a small pot over low heat; add minced garlic and cook for 1-2 minutes until fragrant. Let cool.
- In a mixing bowl, combine flour, parsley, sugar, yeast, and salt.
- Add warmed milk, egg, and cooled garlic butter to the dry ingredients. Knead on low speed until smooth (10-12 minutes).
- Divide dough into 12 equal pieces; shape each into a ball and place in the prepared pan.
- Cover with plastic wrap; let rise in a warm area until doubled in size (1-2 hours).
- Brush risen rolls with beaten egg wash; bake for 20-30 minutes until golden brown.
- Brush with additional melted garlic butter while hot; sprinkle with flaky sea salt if desired.
Nutrition
- Serving Size: 1 roll
- Calories: 165
- Sugar: 2g
- Sodium: 190mg
- Fat: 6g
- Saturated Fat: 4g
- Unsaturated Fat: 1g
- Trans Fat: 0g
- Carbohydrates: 24g
- Fiber: 1g
- Protein: 4g
- Cholesterol: 20mg